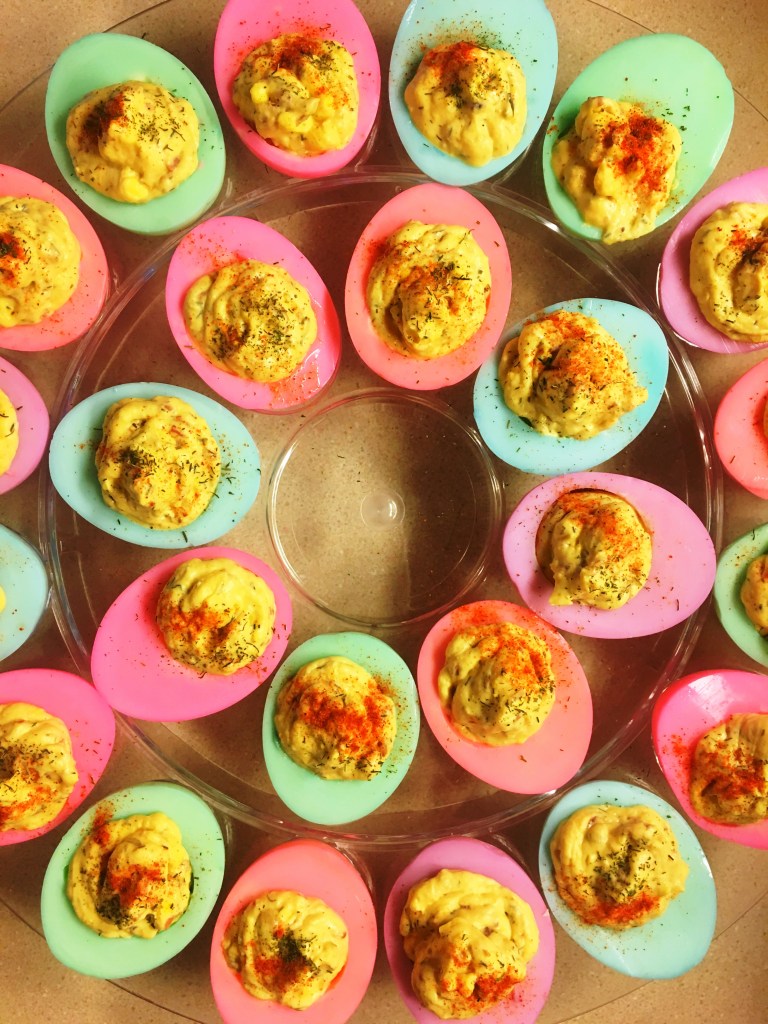
I’m making these for Easter, but honestly, if you change up the coloring, this is an easy trick to pull off for ANY holiday, or any color-scheme!!
A little over a year ago I discovered Deviled Eggs…yes, mid-thirties and this was a “new” thing to me. No one in my family ever made these for any occasion, and I guess because only recently have “hipsters” made old timey things cool again, have these begun showing on on restaurant menus everywhere?? So anyway, I was hooked from my first bite, and a little mad that I’d been missing out for most of my life. I made it my mission to scour Pinterest looking for different variations on the classic, and believe me, there are some VERY INTERESTING recipes out there for this that made me shake my head in….disbelief? Wonder? Disgust?
Anyway, I’ve put together my spin on The Deviled Egg…and made it JUUUUUUUST a little extra by dying the whites. I’ve done this for Easter and Christmas thus far, but you could really use any combination of coloring for the whites, so patriotic eggs! Wedding color scheme eggs! Halloween eggs!! The possibilities are limited only by your ability to create new colors with food dye!
INGREDIENTS
- 12 eggs (I used Extra Large)
- 6 tablespoons mayonnaise
- 3 tablespoons Dijon mustard
- 2 tablespoons pickle relish
- 2 tablespoons Hormel Crumbled Bacon (or cook up fresh bacon if you’d rather; this is easier!)
- 2 teaspoons dill
- 1/4 teaspoon salt
- 1/4 teaspoon pepper
- Paprika for sprinkling
- Extra Dill for sprinkling
- Food Coloring (your choice of colors!!)
- Water
INSTRUCTIONS
- Boil the eggs in water for around 10-12 minutes. Drain the hot water and cover with cold water. Allow to cool until they’re easier to handle.
- Once cooled, peel eggs , cut in half length-wise and scoop out the yolks into a mixing bowl.
- Add mayonnaise, mustard, relish, bacon, dill, salt and pepper to the yolks and mash together til the only bumps are from the bacon bits.
- Spoon filling mix into a sandwich or quart sized ziplock bag. Seal and put aside.
- ONTO THE COLORING!! Fill bowls 3/4 full with cool water; you’ll want a separate bowl for each color you’re using. If you’re planning ahead for orange or purple, feel free to double up and add the extra color after your yellow or blue eggs have been completed.
- Add 6-8 drops of food coloring to each water bowl and stir to combine. You can add more dye to speed up coloring time.
- Add your eggs, you can fit 2-3 at a time depending on bowl size, and let sit until you achieve your desired shade/intensity. Note, you may need to flip your eggs over so saturate each side.
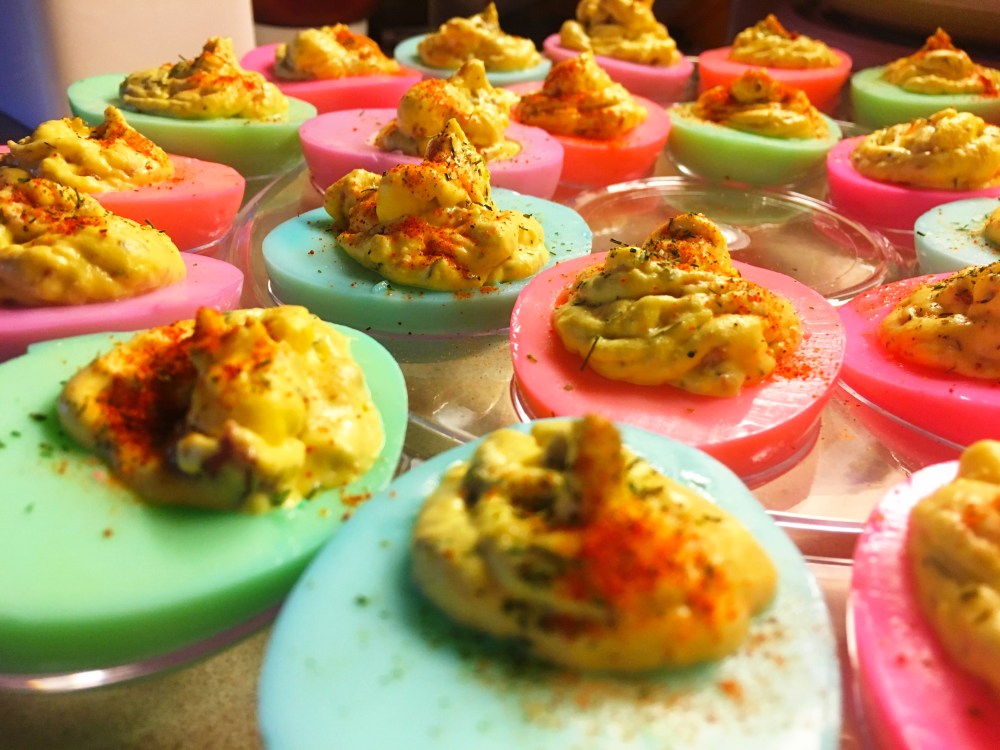
- Once you have achieved your desired colors, remove eggs and pat dry. Then place “artfully” on your platter( read-alternate your colors!!)….I’m HOPING you have a deviled egg dish?? You know, with the little slots for each half of the egg?? So much easier to control, as they’re slippery. If not, no worries, any regular platter will do!
- Back to your ziplock bag of filling: snip off one corner of the bag…keep in mind, a smaller hole is easier to control! You have now have a DIY “piping bag” to easily control the flow of filling into each egg. AND you can fill them very prettily!!
- Divide the filling evenly between the 24 shells…it’s a less is more approach as you can always go back once they’re all filled and top off with any remaining filling!
- Sprinkle paprika and more dill (if desired) and serve chilled.
Can I make this in advance, you might ask?? YES! The filling and the dyed eggs can sit overnight in your fridge! You can totally wait until they need to be served to combine the shells and the filling. One thing I’ve noticed with the “overnight” method: green colored eggs turn more blue with time…not sure if it’s because I didn’t give them enough time in the dye bath? Or if it’s just the way it is, but something worth remembering if you NEED those eggs to be green…do it day of!
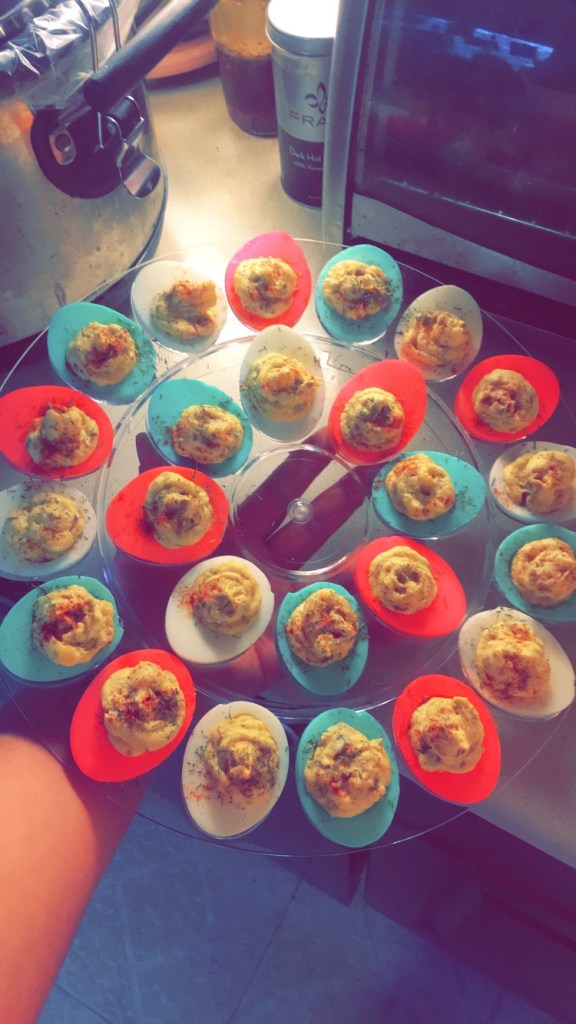
You can kind of see what I mean about the green turning blue here??
